Disc Repair#
This page is a tutorial on repairing scratched discs that are giving you errors such as Mismatching CRCs, Read Errors, Sync Errors and so on.
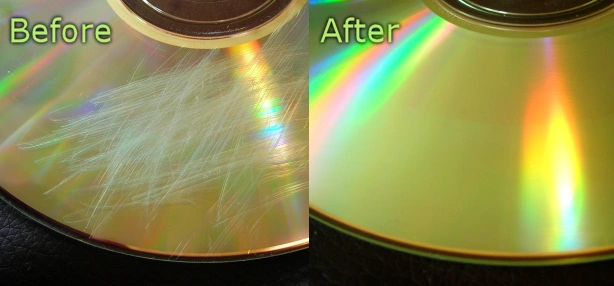
This tutorial works by repairing cracks and scratches on the outer-most layer of the disc, preventing the laser from picking up cracks and scratches as pits or lands (data). This method is essentially a hand-labour version of the automated disc levelling machines.
Once repaired by following this tutorial, you will still notice light scratches if any, but they shouldn’t affect playback unless it damaged the inner-most layers.
Warning
If it isn’t clear, this is very much a DIY cheapo option to try and repair a disc read problem. If you have a disc of rare content that may potentially be lost to time, go to a professional data recovery service and let them professionally resurface it instead.
While this method is incredibly common online, it definitely has a mixed bag of success. Do this only as a very last attempt on something not worth much. Do not do this on discs you do not own.
Warning
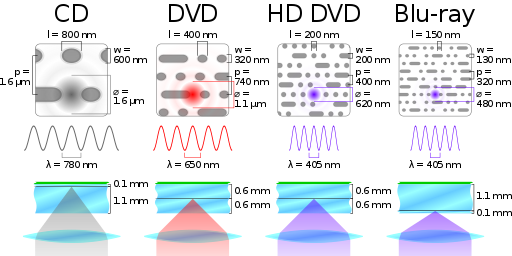
This tutorial is primarily aimed at CDs. Use this with caution on DVDs, HD DVDs and Blu-rays. The method used is only safe on CDs due to how far away the data side is from the read side of the polycarbonate layers. You have about half the space on DVD and HD DVD, and a 1/10th of the space on Blu-ray.
Note
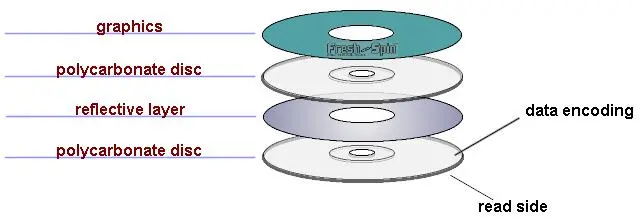
This tutorial only helps repair the read-side of the polycarbonate layer. This will not help fix the reflective or encoding-side polycarbonate layers at all.
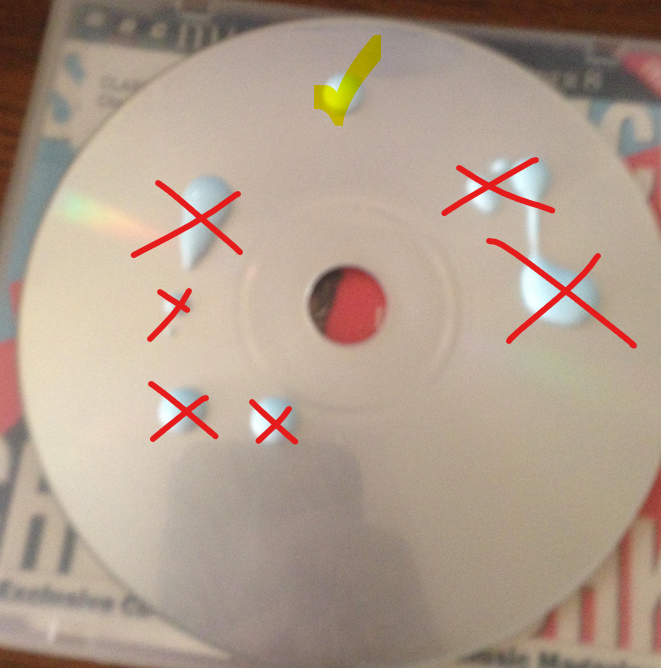
For reference, this is what a very badly decayed disc looks like, with the reflective layer effectively shedding like paint cracks:
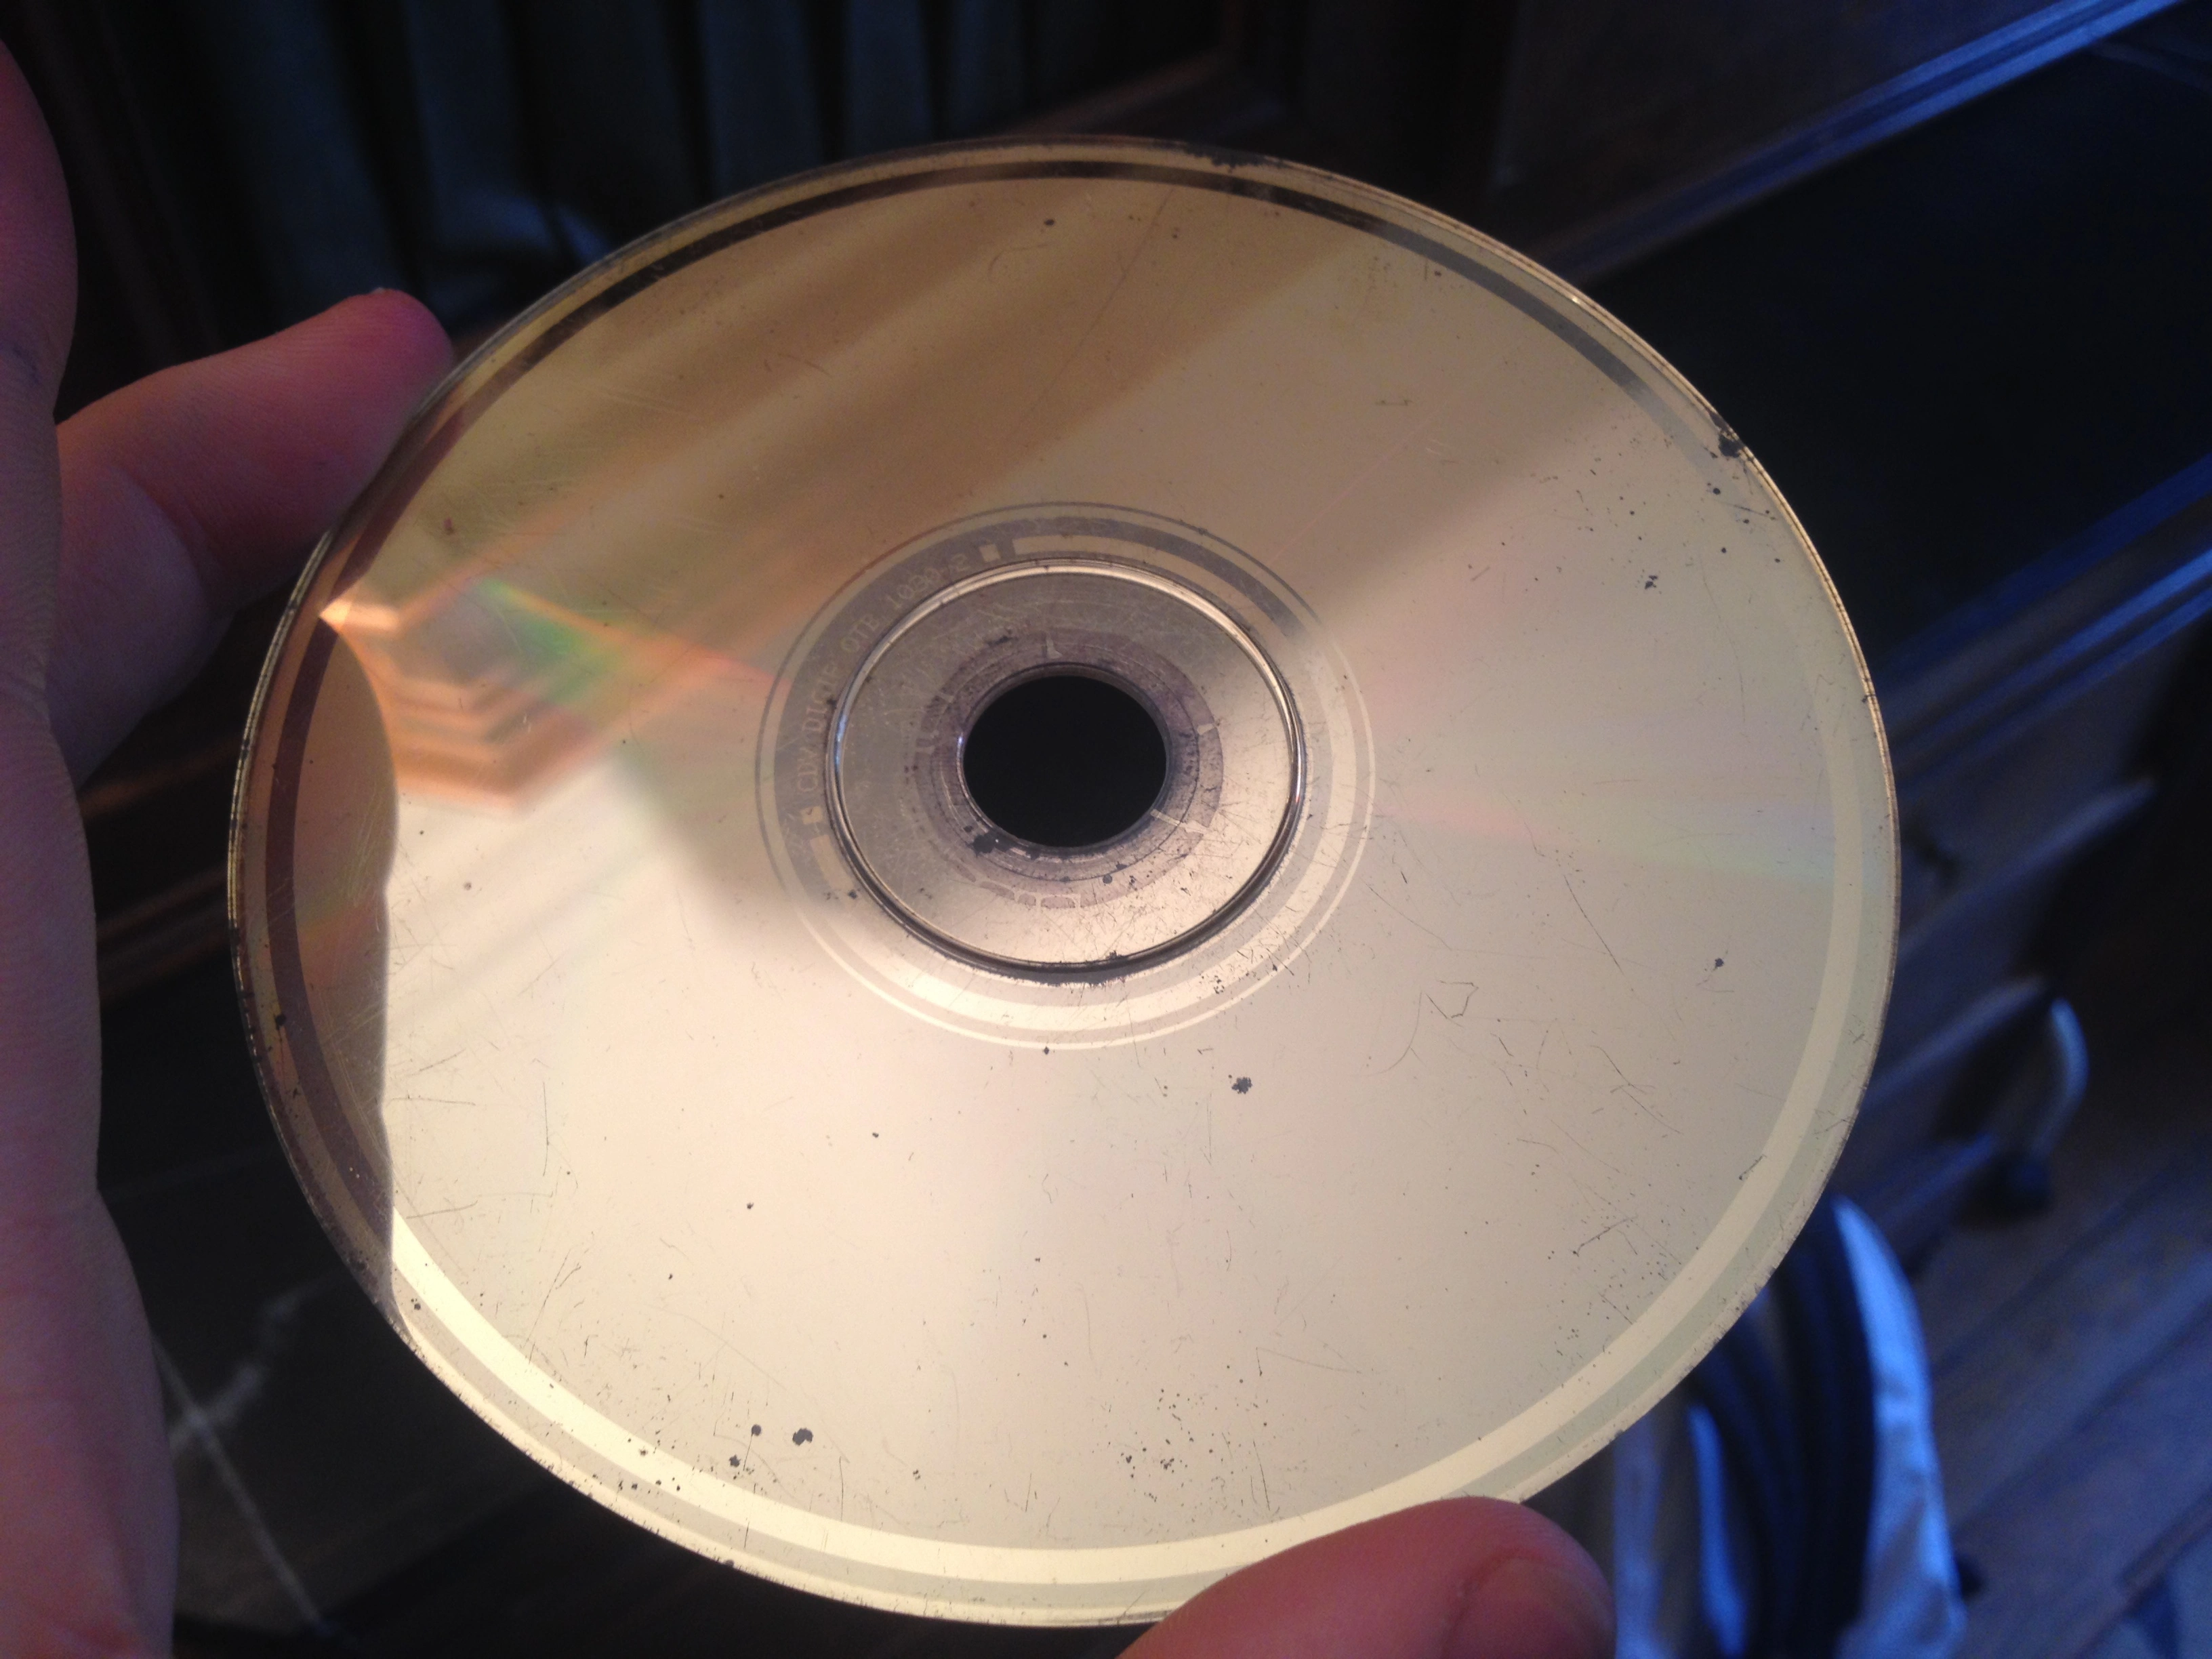
This would be an example of a disc that this method will not do anything to fix, at all.
Credit
Full credit for this tutorial goes to BebeVentreHumide over on RED. I’ve rewritten the tutorial here for accessibility. Most text has been rewritten, some new information and images has been added, and is overall more friendly to those not familiar with Disc technology as a whole.
While BebeVentreHumide didn’t come up with this method, the fantastic information and images deserve credit.
Alternate Guide
An alternative guide brought up on the same RED thread that worked for some users surprisingly well was a guide by electronicsNmore which does do some stuff quite differently. Some stuff done or recommended is NOT recommended by this specific tutorial.
Before we begin#
You really should test this out with a scratched disc of less value or sentimental value. There’s many reasons, but the biggest is a lot of people seem to by superstition or luck, fuck the first disc, then have high stride with the rest of the discs they try.
You also shouldn’t simply believe anything a guide says, especially if it says to sand down your disc. So try first on a test disc that means nothing to you.
If you don’t have another scratched disc to try with, buy a cheap rewritable disc, burn as much data as it can fit as to have data written to every crevice on the surface, and scratch it intentionally. Scratch it good everywhere around the disc, like the kid borrowing your SpongeBob.
Ensure you can or can’t read a file, sector, or such before you proceed. This way you know if it actually helped or just made the disc look prettier.
What you need#
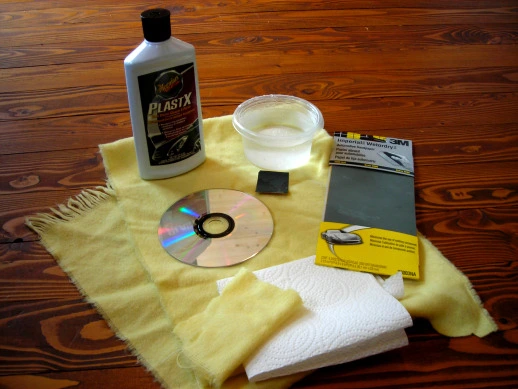
A problematic disc
5 to 10 minutes
Clear Plastic Cleaner & Polish Solution (e.g., PlastX, 3M Scratch Remover)
Emery paper (Ideally 1000, 2000, and 3000 grit to alternate with)
A soft piece of cloth (e.g., Sponge yellow-side, paper towel, t-shirt, sock)
A small bowl of luke-warm water (or running water)
BebeVentreHumide got items #3 and #4 from his local Canadian Tire auto-store for a total of $13.49, stating as enough to repair over one hundred discs.
Tip
Alternatives to Meguiar’s PlastX would be any similar clear plastic cleaner & polish solution. For example: - 3M Scratch Remover - Brasso Metal Polish
Warning
Do not use any Emery/Sandpaper below 2000 grit. Even finer than 2000 would be ideal. Some have reported problems with less than 2000 grit, and some had issues with nothing less than 4000 grit.
The Repair#
The process is simple. Sand away the current scratches and rebuff it with clear plastic polish solutions.
Stage 1: Sanding#
It is ideal to use multiple stages of Emery paper when sanding the disc. Go for lowest grit to highest as time goes on. Ideally start with around 1000 or 2000, and end at around 3000.
When sanding, if you feel a grain of material under the emery paper, or hear the sound change, stop sanding. Wash the emery paper and disc, then continue.
Cut a small piece of emery paper. About the size of one side of the discs width is enough.
Soak the piece of emery paper in luke-warm water. Make sure it hasn’t gone cold.
Sand the disc in straight-line motions from one edge to another edge. Do not curve your motion.
Warning
While sanding, apply only light pressure on scratch-free areas. Otherwise, generally apply only light pressure unless theres a formidable looking scratch. When you think the scratches are gone, continue sanding for a minute or two.
Warning
Take extra caution and go light near the inner ring of the disc data area as it holds the track data which is very important. If you don’t have issues reading the index or contents of the disc then try avoid sanding it at all, or sand it very lightly with as fine grit as possible.

Once you you are finishing your sanding job, sand from the center near the ring outwards lightly but firmly in a straight line. This is said to help a lot and ultimately be very important.
Stage 2: Buffing#
In this stage of the tutorial, we are simply buffing and filling any holes, cracks, and such with PlastX or another solution to get a smoother and shinier surface. Essentially replacing the plastic that we culled with new plastic.
Rinse the disc properly with warm water and gently dry it off with a paper towel. You should be left with a less glossy, less shiny disc. A matte look to it.
Put a few drops of solution on the CD and polish it with a small piece of cloth until the solution is gone.
Once again, rinse the disc properly with warm water and gently dry it off with a paper towel. You should be left with a glossy and shiny disc again.
Tip
When applying solution, you must push it down into the disc. It does not work if you just smear it around and off the disc onto your desk. You must work it in.
Tip
Sanding under running luke-warm water removes debris better.
Tip
You only need a small serving of PlastX (or your similar solution).
What now#
You should now inspect the disc and see if you got rid of the scratches. Again, you may be left with a small few light scratches, don’t try to get a perfect looking disc.
Try read the disc and if it still gives you problems, carefully inspect to see if there are any problematic scratches left. It’s possible you did not sand down enough, or didn’t apply enough solution. Repeat Stage 1 and/or 2 again.
If you still have problems and it looks like some form of damage isn’t going away, it is possible big scratches could be below the outermost layer, possibly being damage on the reflective layer.